No sound on Windows 11 usually comes from one of a handful of causes: wrong output device selected, Windows Audio service stopped, outdated or corrupted driver, or audio enhancements causing conflicts. Here are 9 fixes in order of likelihood.
1. Check Volume and Output Device
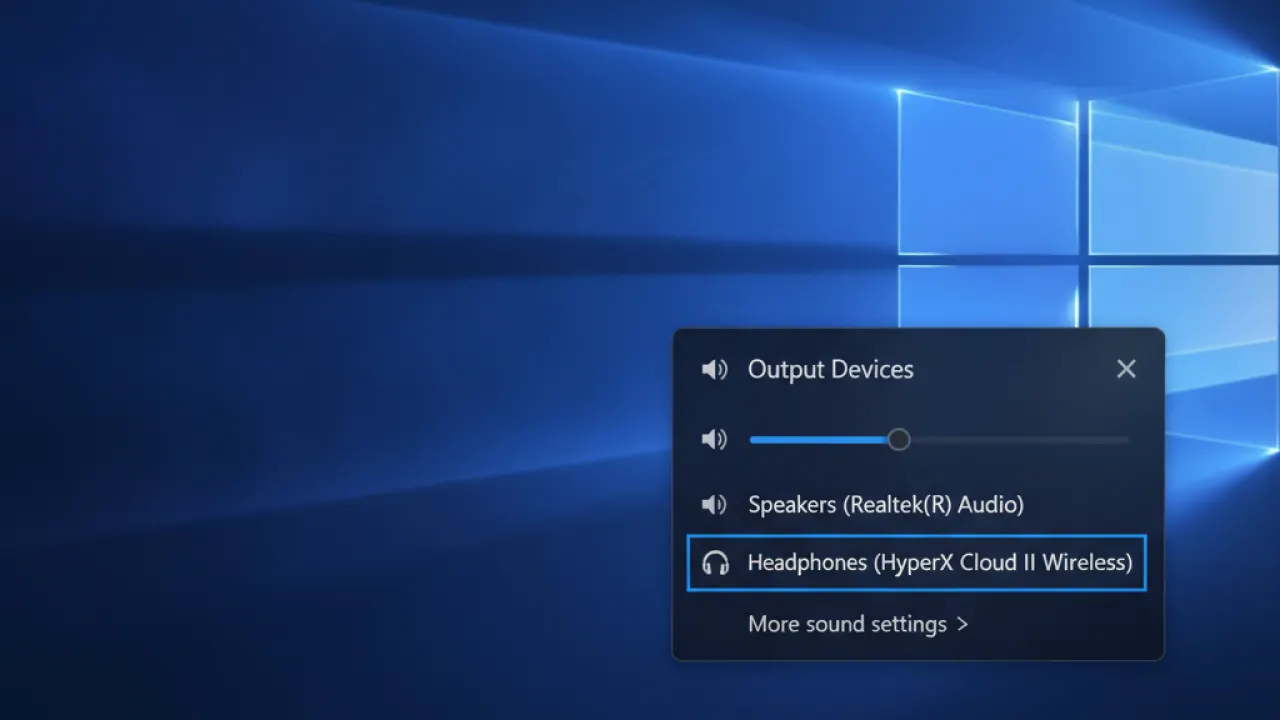
Check the obvious first. Click the speaker icon in the taskbar and confirm volume isn’t at zero. Also click the arrow next to the volume slider to expand device selection — Windows may have switched to a different output (like an HDMI display or unplugged headphones) without notifying you. Select your correct speaker or headphone device from the list.
2. Run the Audio Troubleshooter
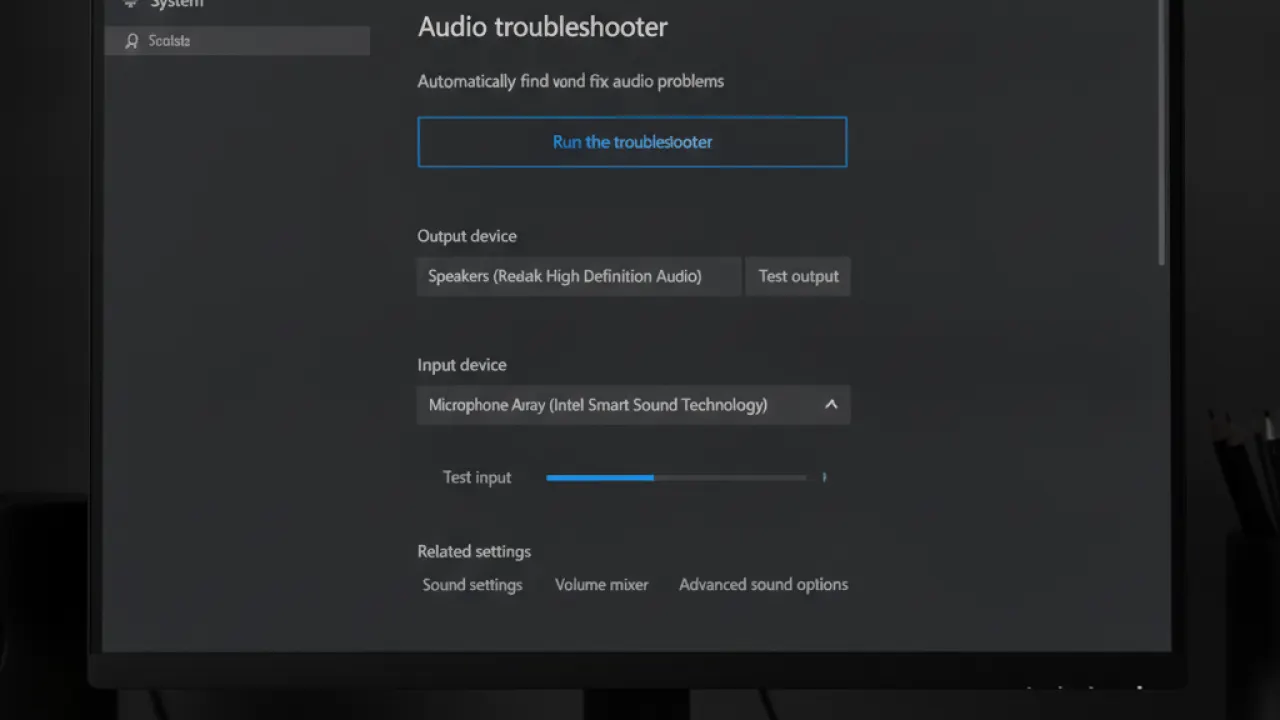
Settings, then System, then Troubleshoot, then Other troubleshooters, then Run next to Playing Audio. The troubleshooter catches service issues and driver conflicts automatically. Even when it says “no problems found,” the process resets audio components in the background that sometimes fixes the issue.
3. Restart Windows Audio Services
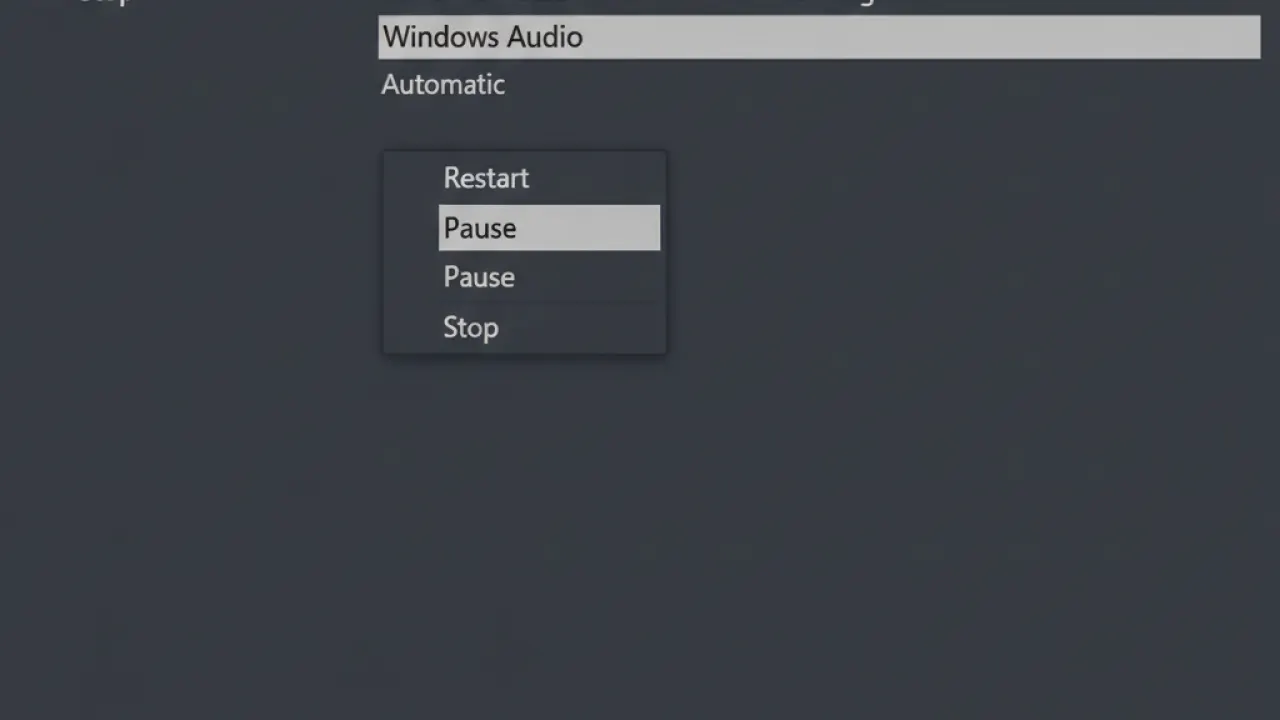
Press Windows + R, type services.msc, press Enter. Find Windows Audio, right-click, choose Restart. If it shows Stopped, right-click and choose Start. Also restart Windows Audio Endpoint Builder. This fixes audio that stopped working after a sleep cycle or crash.
4. Set Default Playback Device

Right-click the speaker icon, choose Sound settings, scroll to Advanced, click More sound settings. In the Playback tab, right-click your speaker or headphone device and choose Set as Default Device. Also check that the device isn’t muted by right-clicking and choosing Properties.
5. Update or Reinstall Audio Driver
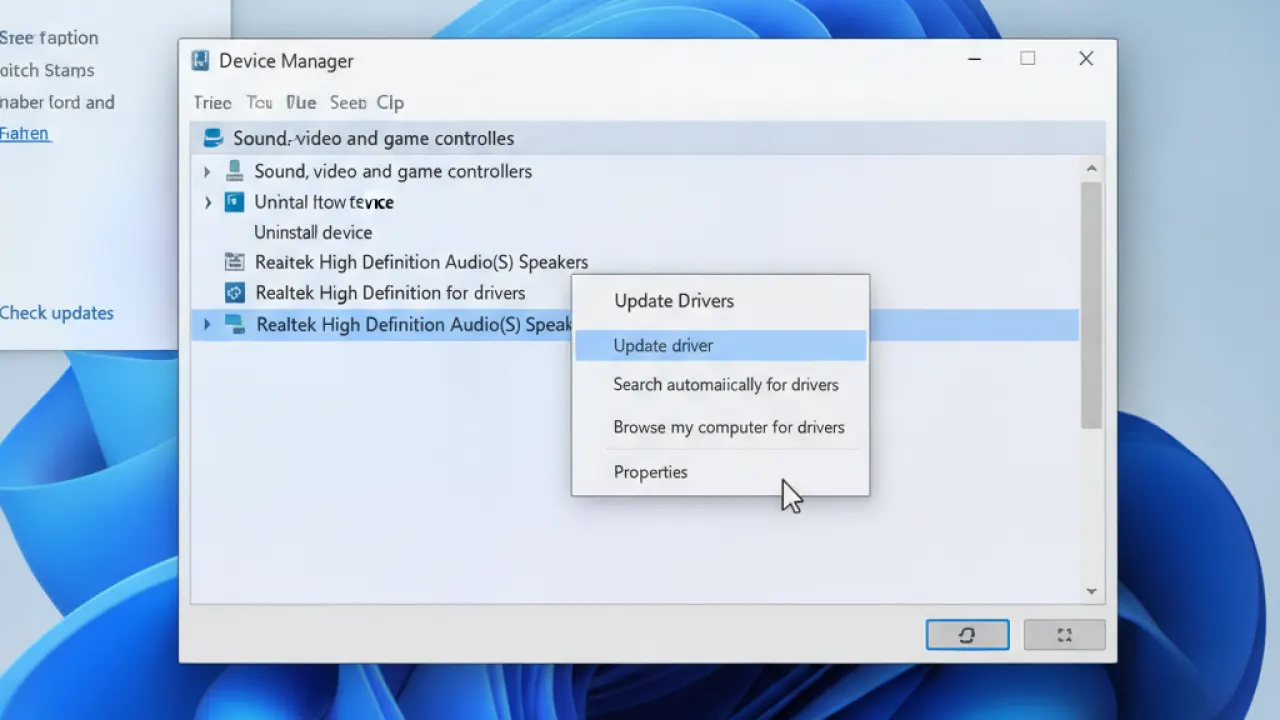
Right-click Start, choose Device Manager, expand Sound, video and game controllers. Right-click your audio device and choose Update driver, then Search automatically. If that doesn’t find anything newer, try Uninstall device, then restart. Windows reinstalls the driver on boot. If issues persist, download the latest driver directly from your PC or motherboard manufacturer’s website.
6. Disable Audio Enhancements
Right-click your audio device in Sound settings, choose Properties, go to the Enhancements tab, check Disable all enhancements. Some enhancement features cause conflicts with certain hardware. Click OK and test.
7. Check Windows Updates
Settings, then Windows Update, then Check for updates. Install everything including optional driver updates. Many audio problems are fixed in patches that haven’t installed yet.
8. Disable Bluetooth or Other Audio Devices
Windows sometimes routes audio to a recently connected Bluetooth device rather than your speakers. In Device Manager, expand Bluetooth and disable any Bluetooth audio devices you’re not currently using. This forces audio back to your wired speakers or headphones.
9. Run SFC Scan
Open Command Prompt as Administrator. Run: sfc /scannow. This checks for corrupted Windows system files that can cause audio service failures. Restart after it completes. The same diagnostic approach applies to other hardware issues. Our guide to fix Wi-Fi on Windows 11 covers the equivalent process for network problems. For general Windows performance including hardware troubleshooting, speed up Windows 11 covers the broader approach.
Which fix solved your Windows 11 audio problem? Leave a comment with your hardware setup and which step worked — audio hardware varies a lot and specific information helps other readers with similar hardware.